Create and use the Markup Room
Markup Rooms are powerful tools for eSignature tagging that can be embedded anywhere in your workflow. In this guide, we will walk you through the process of creating a Markup Room using the Stewart Sign API and take a tour of the Markup Room created. Let's get started!
Create a Markup Room
To create a Markup Room, you need to make a POST request to the following API endpoint:
POST /esign/create-markup-room
Parameters and Payload
The API request requires the following parameters and payload in the request body:
config: This object contains the configuration settings for the Markup Room, including options for identity verification, authentication, document editing, and participant management.participants: An array of participants to be added to the Markup Room. Each participant should include details such as their first name, last name, and email address.documents: An array of documents to be included in the Markup Room. You need to provide the file IDs or paths of the documents to be added.senderId: The user ID of the individual creating the Markup Room. This user must belong to the organization that the access token was issued for.
Here's a code snippet that demonstrates how to make the API request using the Stewart Sign API and the provided sample code:
const axios = require("axios");

const createMarkupRoom = async () => {
  const url = "https://public-api.sign.stewart.com/esign/create-markup-room";
  const accessToken = "<YOUR_ACCESS_TOKEN>";

  const payload = {
    config: {
      // Configuration options for the Markup Room
      // Customize these based on your requirements
    },
    participants: [
      {
        firstName: "John",
        lastName: "Doe",
        email: "john.doe@example.com",
      },
      // Add more participants if needed
    ],
    documents: [
      "<DOCUMENT_FILE_ID_1>",
      "<DOCUMENT_FILE_ID_2>",
      // Add more document file IDs or paths
    ],
    senderId: "<SENDER_ID>",
  };

  const headers = {
    Authorization: `Bearer ${accessToken}`,
    "Content-Type": "application/json",
  };

  try {
    const response = await axios.post(url, payload, { headers });
    console.log("Markup Room created successfully:", response.data);
  } catch (error) {
    console.error("Error creating Markup Room:", error.response.data);
  }
};

createMarkupRoom();
Replace <YOUR_ACCESS_TOKEN>, <DOCUMENT_FILE_ID_1>, <DOCUMENT_FILE_ID_2>, and <SENDER_ID> with your actual values.
Markup Room Usage
In the next step, we will learn how to use the Markup Room.
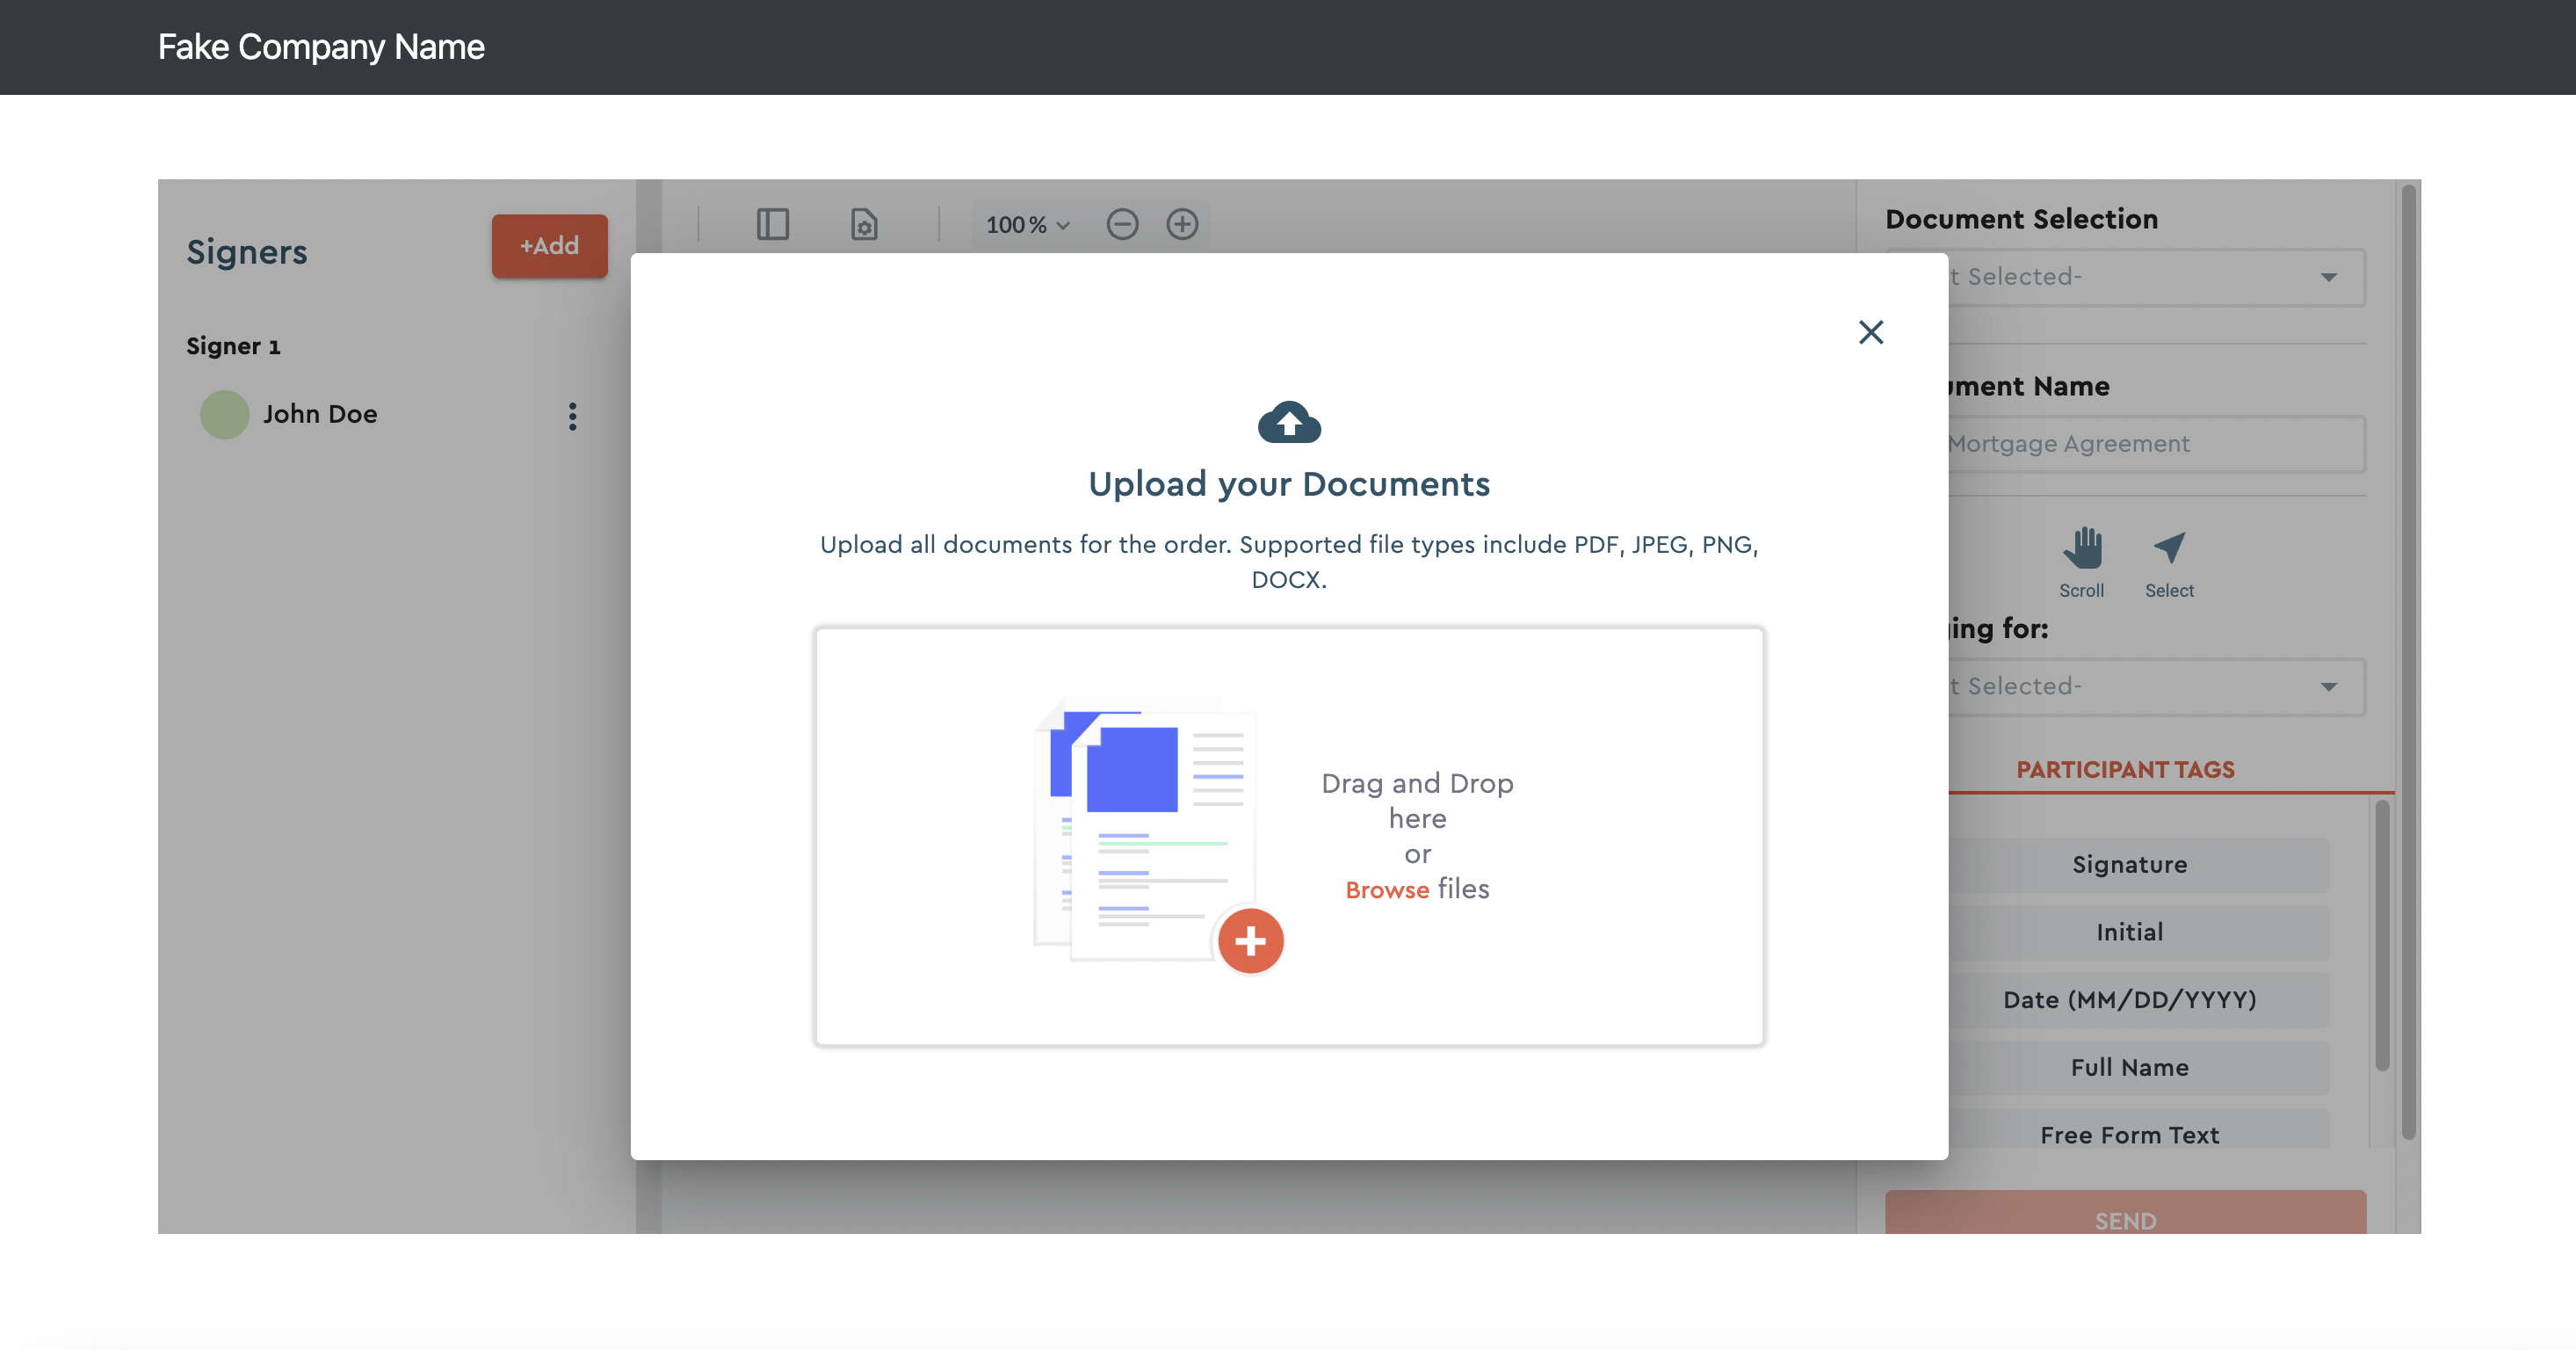
Once you have the Markup Room URL provided as a response to the call above. You can use that in an iFrame on any page. In most scenarios, this would be when the user is managing a document in your system that they want to send for eSignature.
Below a basic HTML page that includes a navigation bar at the top and an iframe displaying the Markup Room URL content at the bottom. It utilizes Bootstrap for the navigation bar styling and jQuery for dynamic behavior. We will be using this code to simulate using the Markup Room in your user experience.
<!DOCTYPE html>
<html lang="en">

<head>
  <meta charset="UTF-8">
  <meta name="viewport" content="width=device-width, initial-scale=1.0">
  <title>Markup Room Viewer</title>

  <!-- Bootstrap CSS -->
  <link rel="stylesheet" href="https://cdnjs.cloudflare.com/ajax/libs/twitter-bootstrap/5.5.0/css/bootstrap.min.css">

  <!-- jQuery -->
  <script src="https://cdnjs.cloudflare.com/ajax/libs/jquery/3.6.0/jquery.min.js"></script>
</head>

<body>
  <!-- Navigation Bar -->
  <nav class="navbar navbar-expand-lg navbar-dark bg-dark">
    <div class="container">
      <a class="navbar-brand" href="#">Fake Company Name</a>
    </div>
  </nav>

  <!-- Markup Room Content -->
  <div class="container mt-5">
    <div class="row">
      <div class="col">
        <iframe id="markupRoomIframe" src="https://markup.enotarylog.com/markup-room/<MARKUP_ROOM_ID>"
          width="100%" height="600"></iframe>
      </div>
    </div>
  </div>

  <!-- Script to adjust iframe height dynamically -->
  <script>
    $(document).ready(function() {
      var iframe = $("#markupRoomIframe");
      iframe.on("load", function() {
        $(this).height($(this).contents().height());
      });
    });
  </script>

  <!-- Bootstrap JS -->
  <script src="https://cdnjs.cloudflare.com/ajax/libs/twitter-bootstrap/5.5.0/js/bootstrap.min.js"></script>
</body>

</html>
Replace <MARKUP_ROOM_ID> with your actual values.
Screenshot of the sample code above used
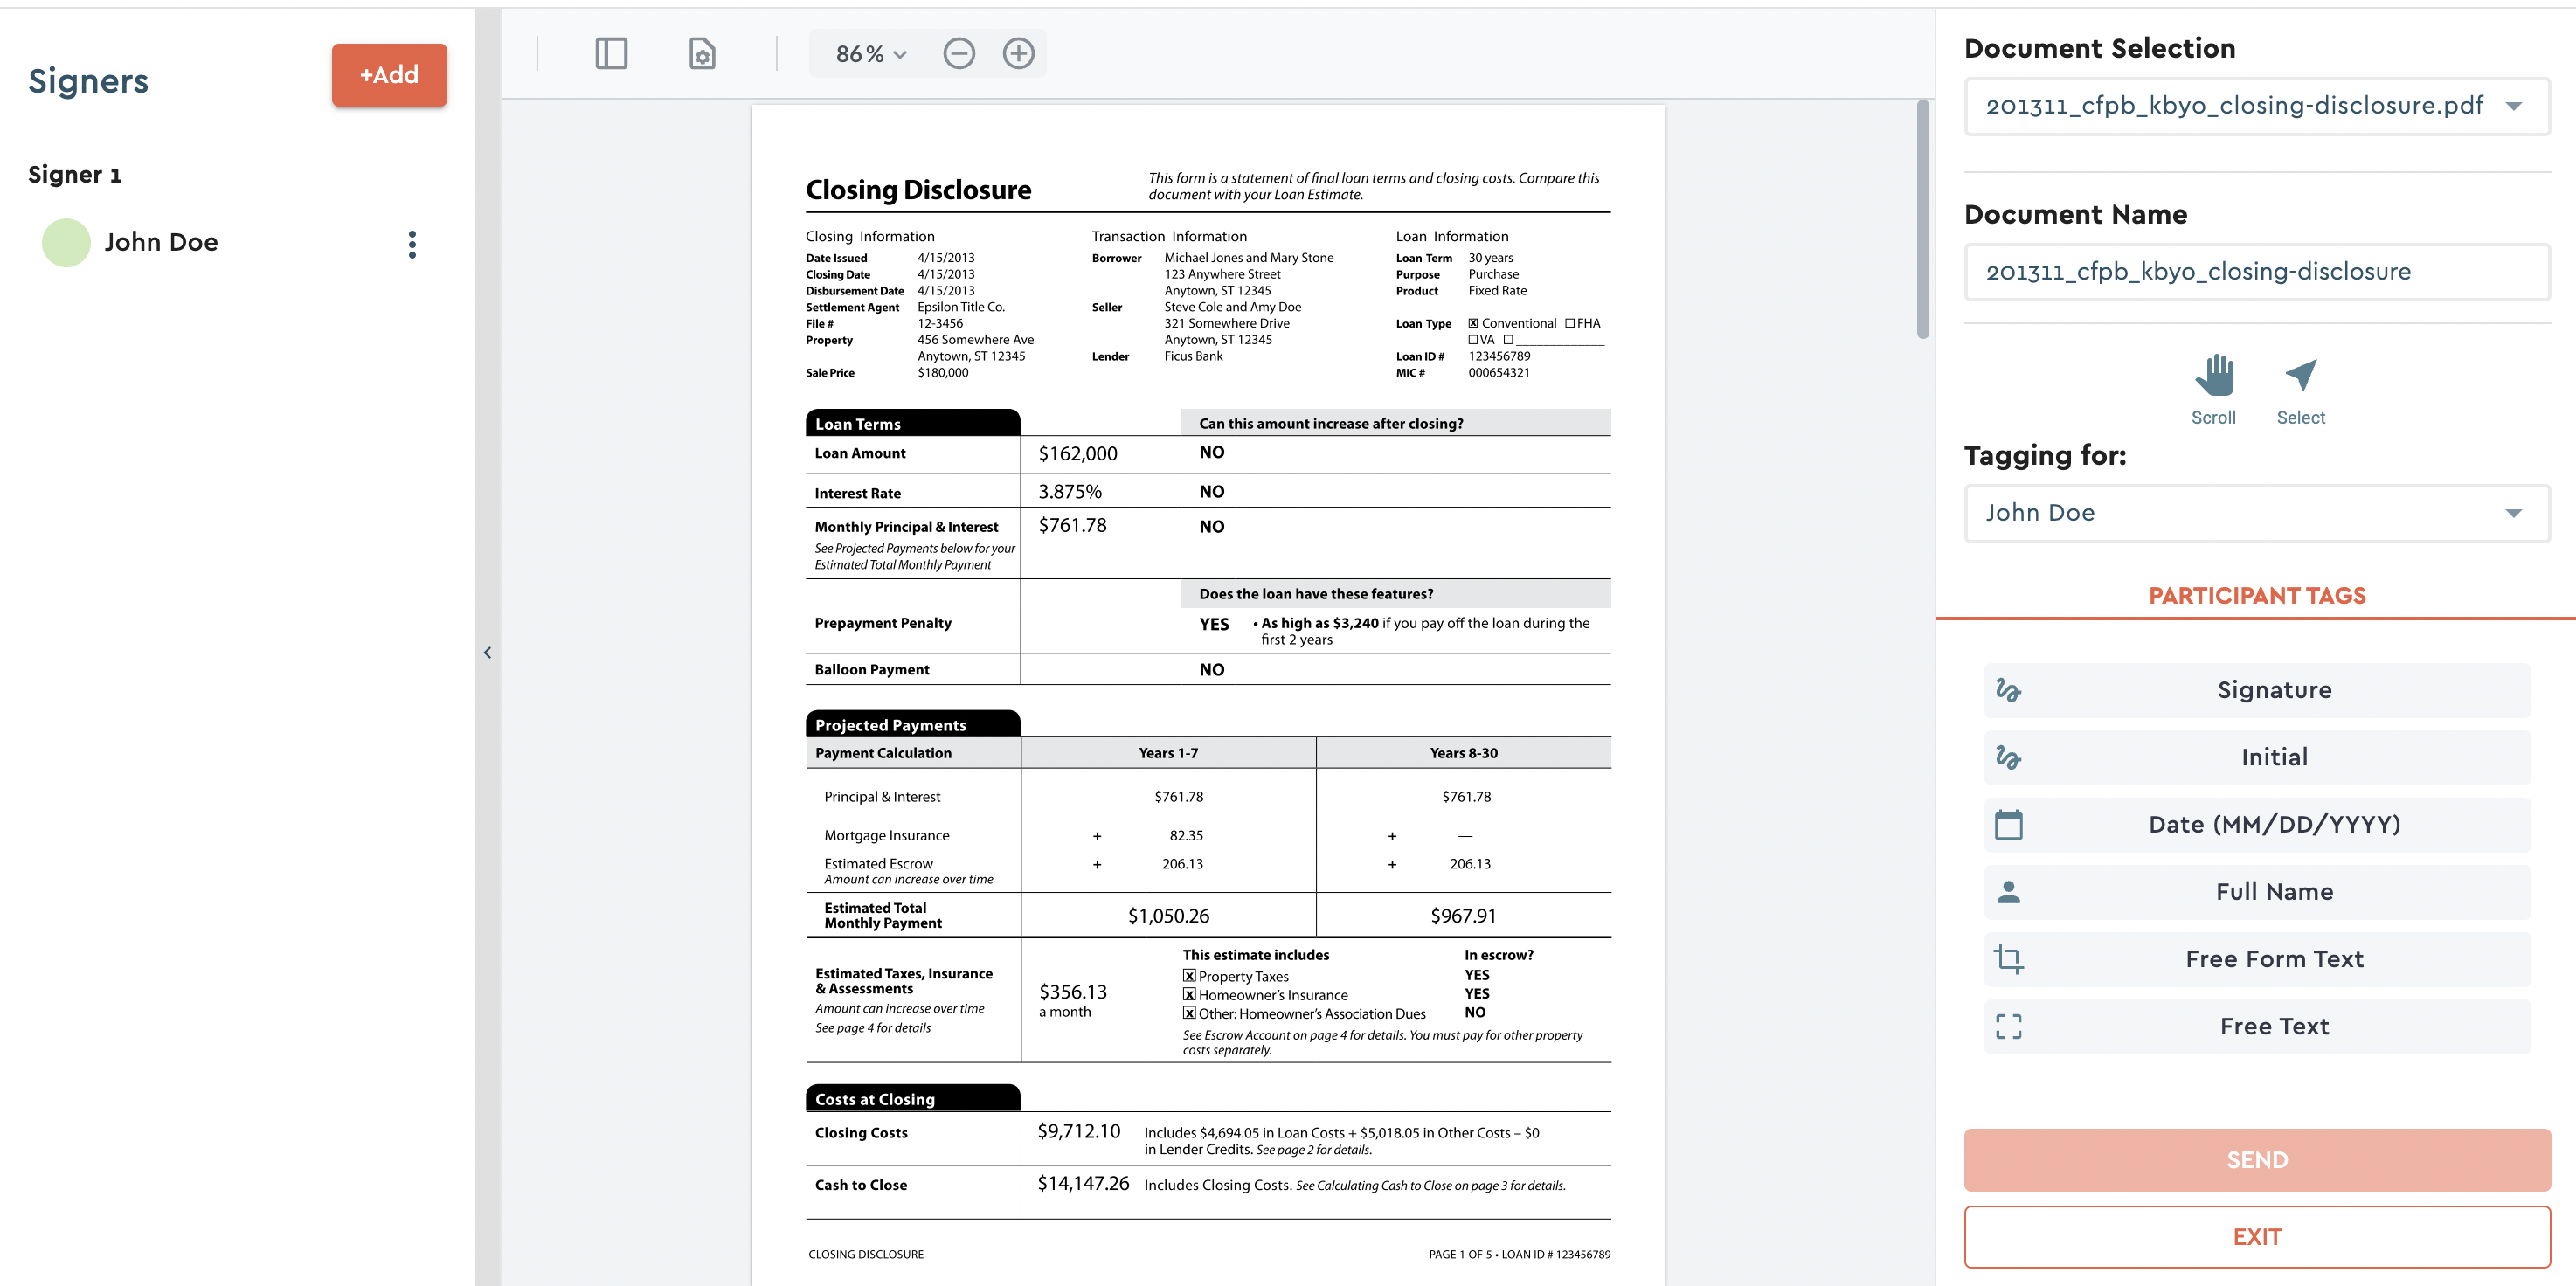
Navigating the Markup Room
Once you have a Markup Room loaded, you can start adding participants (users) and documents, and tagging. In this step, we will explore how to add participants, edit participant details, and tag up the eSign document within the Markup Room.
Markup Room Interface
Adding Participants
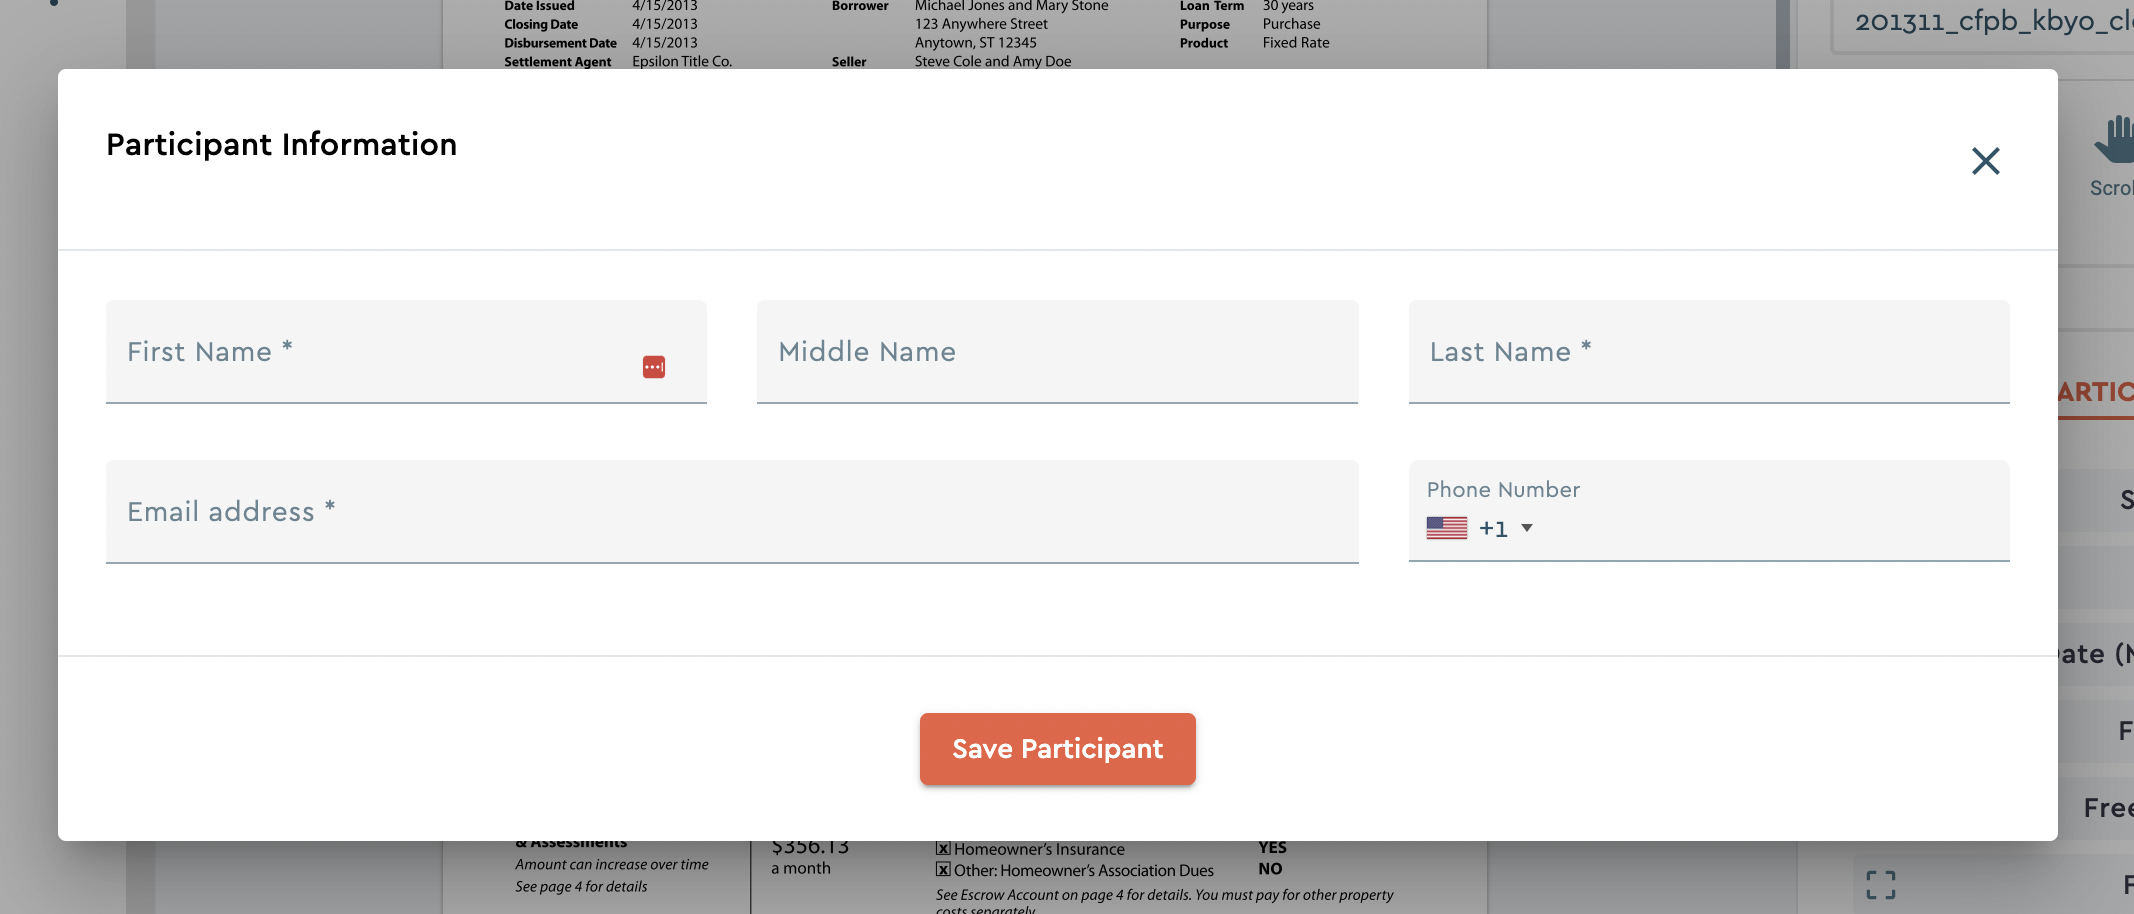
To add participants to the Markup Room, follow these steps:
- Open the Markup Room by clicking on the Markup Room URL received after creating it.
- In the Markup Room interface, locate the "Signers" section.
- Click on the "Add" button.
- Enter the required information for each participant, such as their first name, last name, and email address.
- Click "Save Participant" to add the participant to the Markup Room.
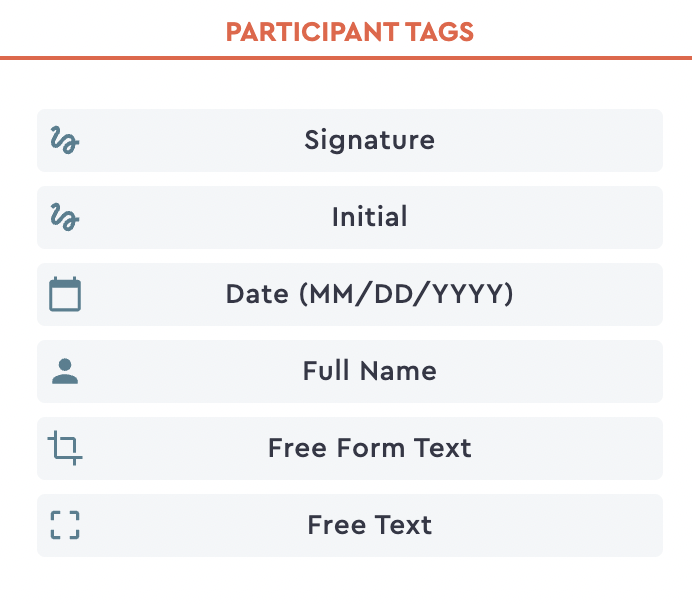
Tagging up the eSign Document
The Markup Room provides powerful features for tagging up the eSign document. Here's how you can tag up the document:
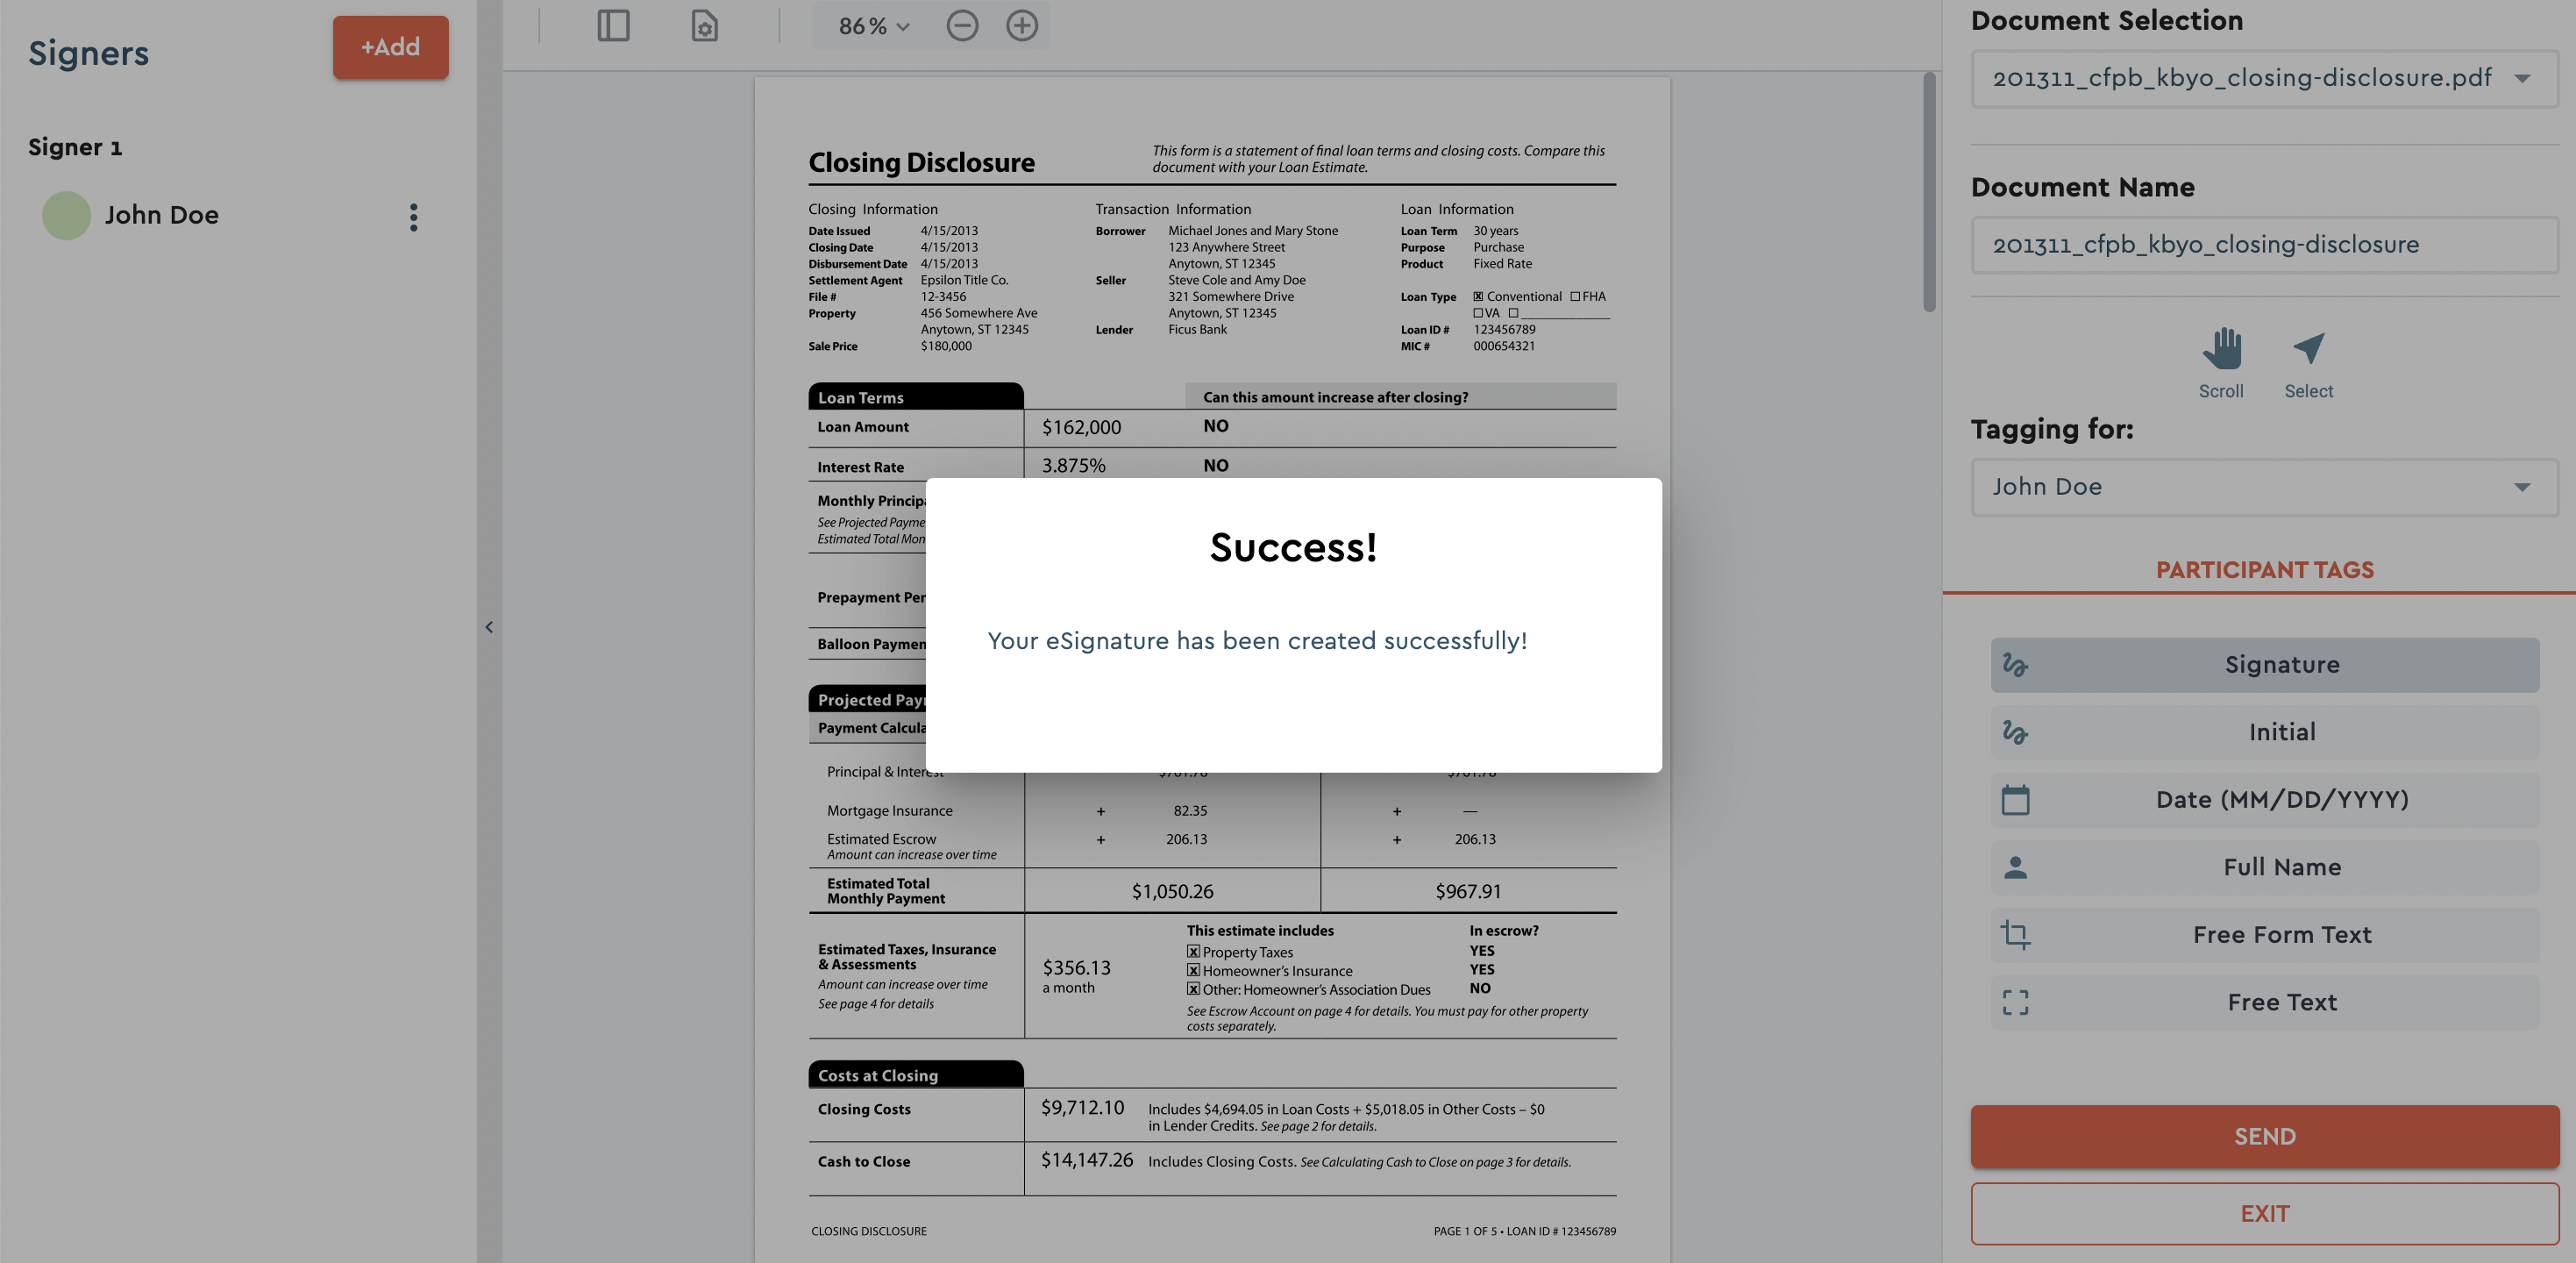
- Open the Markup Room interface and navigate to the center panel where your document is located.
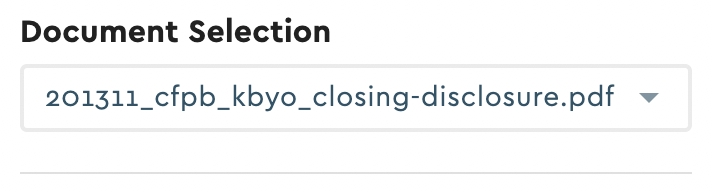
- Locate the document you want to tag up using the top right "Document Selection" dropdown.
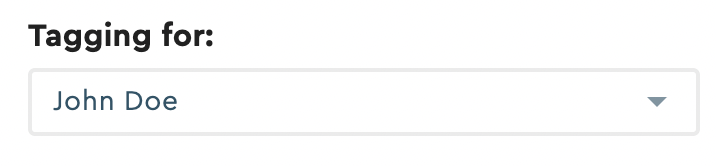
- Locate and select a participant in the "Tagging for:" dropdown.
- Use the available tools under "PARTICIPANT TAGS" in the right panel to add tags or annotations to the document.
- TIP: you can change the signer in the context menu that opens when you drop the tag.
- The changes made to the document are automatically saved.
Finalize and Complete
Once all necessary edits, revisions, and document reviews have been made within the Markup Room, it's time to finalize the eSign process and complete the transaction. The Markup Room provides a seamless workflow for creating eSignatures and capturing completion. Here's how to complete the eSign process within the Markup Room:

- Within the Markup Room interface, locate the button to send the eSign transaction in the bottom right panel.
- Click on the "Send" button to initiate the eSign process.
After clicking "Send," a completion message will be displayed, indicating that the eSign transaction has been created successfully.
Capture the complete event
Additionally, an event is emitted to the parent, typically an iframe. Integrations can capture this iframe completion event and perform actions based on their workflow. This could include redirecting the user, closing their modal, or triggering additional processes. Please note that the appearance and specific steps for finalizing and completing the eSign process within the Markup Room may vary based on the implementation and customization of the Stewart Sign API in your specific integration.
The markup room URL can be embedded in an iframe. When the user has marked up the document and the data is submitted, the iframe will emit to the parent window the following via postMessage.
window.parent.postmessage({ status: 'completed', id: '8d976a23-b865-4fcd-9165-ddc0aedaf614' });
The parent application can listen for this event using the follow sample code:
  window.addEventListener('message', async (e) => {
    try {
      const data = JSON.parse(e.data);
      if (data.status === 'completed') {
        // eSign successfully created
        // handle the completed event and follow your own logic
      }
    } catch (err) {
      // noop
    }
  }, false);
By following these steps, you can successfully finalize the eSign process within the Markup Room and capture the completion event. This ensures a smooth and efficient workflow for eSignatures in your applications and integrations.
Conclusion
Markup Rooms provide a powerful solution for efficient eSignature tagging and creation within the Stewart Sign API ecosystem. By leveraging Markup Rooms, users can streamline their esignature workflows and enhance the overall efficiency of the esignature process.
Key Benefits of Markup Rooms
Streamlined Document Tagging: Markup Rooms allow users to easily add tags to documents, enabling precise and accurate placement of esignatures and other annotations from anywhere.
Flexible Configuration Options: With Markup Rooms, users have control over the configuration settings, including identity verification, authentication, document editing, and participant management. This flexibility enables customization to meet specific esignature security requirements.
Seamless Integration: Markup Rooms seamlessly integrate with the Stewart Sign API, enabling developers to build online esignature integrations with ease.
Some Use Cases for Markup Rooms
Real Estate Transactions: Markup Rooms can be used to facilitate the eSigning of real estate documents, such as purchase agreements, mortgage contracts, and lease agreements. Title agents, realtors and closers can review and annotate documents within the Markup Room, simplifying the overall process.
Legal Contracts and Agreements: Markup Rooms provide a secure environment for eSigning legal contracts and agreements, such as employment contracts, non-disclosure agreements, and partnership agreements. Attorneys, paralegals and admins can tag these documents electronically from within their normal workflow and applications to saving time and effort.
Financial Documents: Markup Rooms are well-suited for eSigning financial documents, including loan applications, financial statements, and investment agreements. Bankers, admins, and investors can securely tag, and set security requirements for documents within the Markup Room, ensuring compliance and reducing administrative burdens.
Document Management Systems: Empower your document management portals by giving your users the ability to get documents tagged and eSigned from directly in your application using Stewart Sign's eSignature APIs.
By leveraging the power of Markup Rooms, individuals and organizations can enhance their esignature processes, simplify the esignature creation, and streamline collaboration among participants. With its intuitive interface and extensive customization options, Markup Rooms provide a robust solution for efficient and secure online signing workflows.
We encourage you to explore and utilize Markup Rooms within the Stewart Sign API to unlock the full potential of efficient esignature tagging and creation in your applications and integrations. Embrace the future of digital signing with Markup Rooms and experience enhanced productivity and convenience in your workflow.